In this post we’re going to learn how to create an age gate with the Bricks Forge node editor. The node editor is a brand new feature in Bricks Forge 3.0.
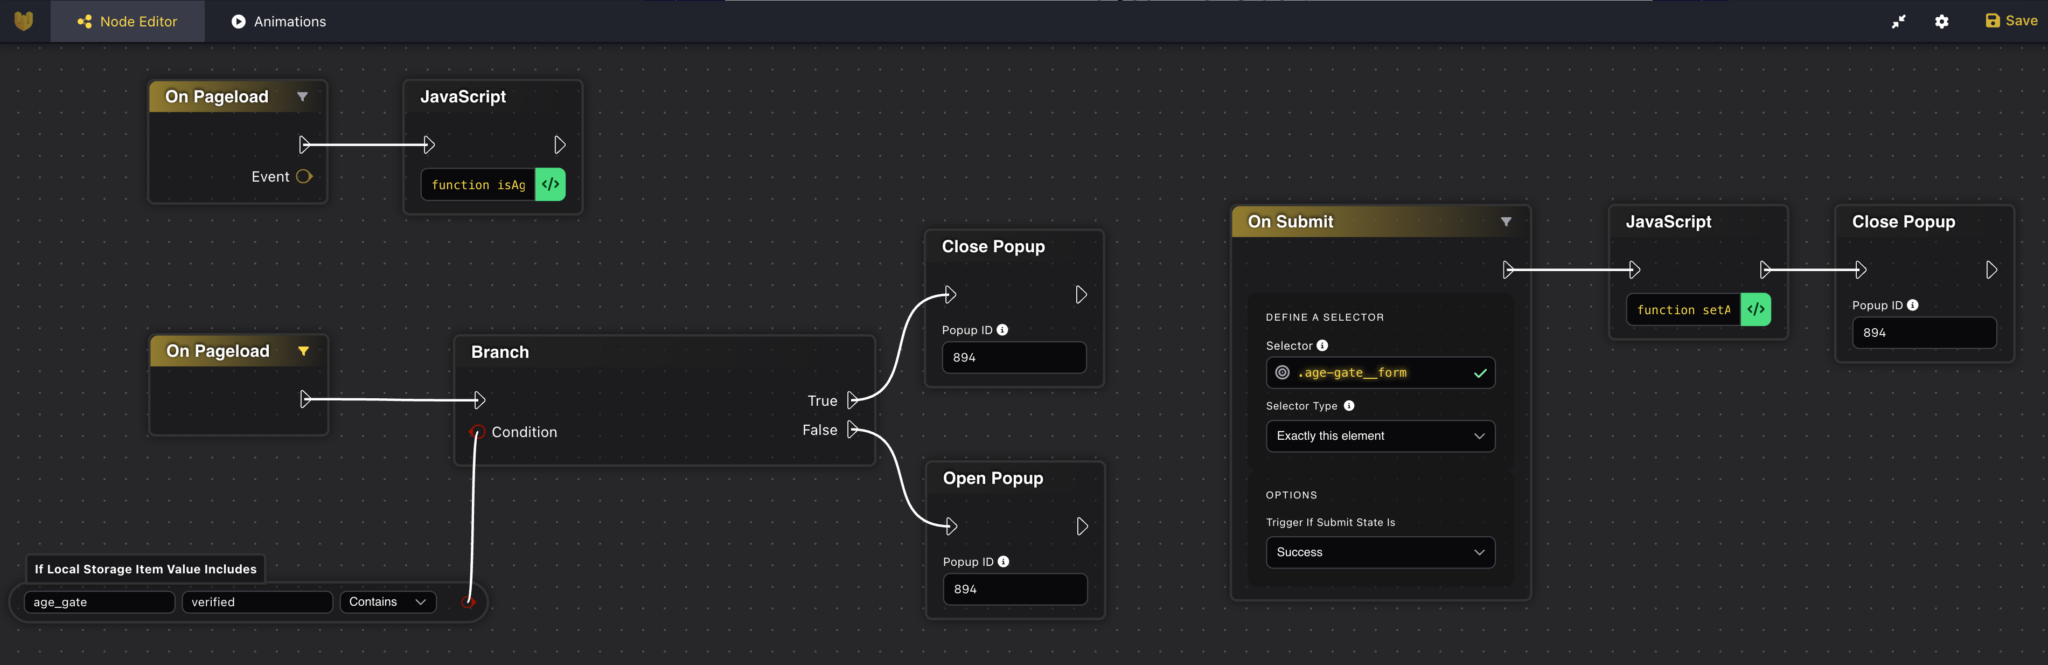
Here is what the Bricks Forge node editor looks like for this tutorial. Pretty cool huh!
Don’t have Bricks Forge Yet? Get it today!
Get Bricks Forge Today!What is the Bricks Forge node Editor
The Bricks Forge node editor is a no code/low code interface where you can build complex workflows inside Bricks Builder. You define events, actions, and control everything with conditions. All you have to do is connect your events, actions, and conditions by dragging wires around to connect each step. Its kinda of like building flows with Zapier or N8N.
How To Build The Age Gate
First, create a popup template with Bricks. Set the popup’s conditions to display on your entire website. Make sure you write down the templates ID. You can find it in the Bricks template section. We will need this template ID later when working with the node editor.

Here is what my popup looks like. You can make it as fancy as you want!

Configure the Bricks Forge node editor to control the age gate
Our age gate will use session storage and the item is called “age_gate”. The value will look like this {“value”:”verified”,”expires”:1765161951}
The expires value will tell the browser how long the to keep the session storage item on the user’s browser. Once it expires, the user will have to agree to see the content again.
Page Load Events
We will need to run three different events inside the node editor.
- two page load events
- one form submission event
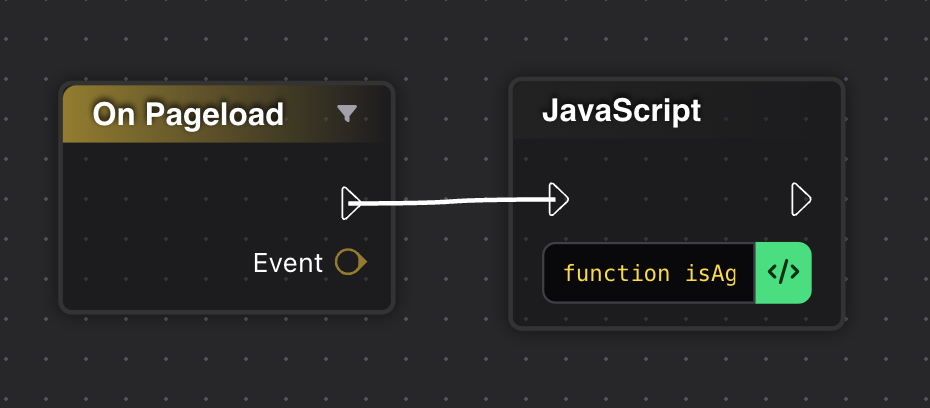
The first page load event will run a Javascript function to check if our age_gate session storage item is set. If it is not set, the popup will display prompting the user to agree to view the content.
function isAgeGateVerified() {
const ageGateData = localStorage.getItem('age_gate');
if (!ageGateData) {
console.log('Age gate is not set.');
return false;
}
const { value, expires } = JSON.parse(ageGateData);
if (Date.now() > expires) {
console.log('Age gate has expired.');
localStorage.removeItem('age_gate');
window.location.reload(); // Add page refresh here
return false;
}
if (value === 'verified') {
console.log('Age gate is verified.');
return true;
}
console.log('Age gate is not verified.');
return false;
}
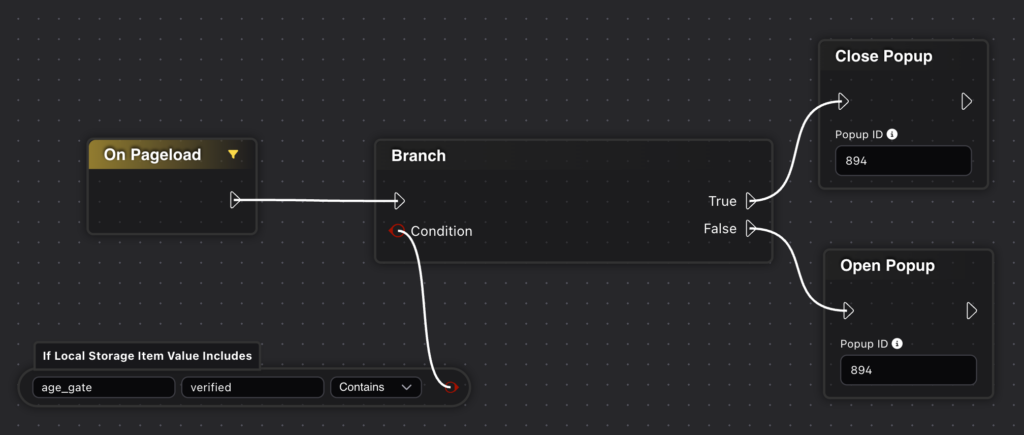
isAgeGateVerified();The second page load event will check if the age_gate session storage item is set and contains the value “verified”. This check will use the node editor’s built in conditional checks to see if the storage item is set or not. No code required!
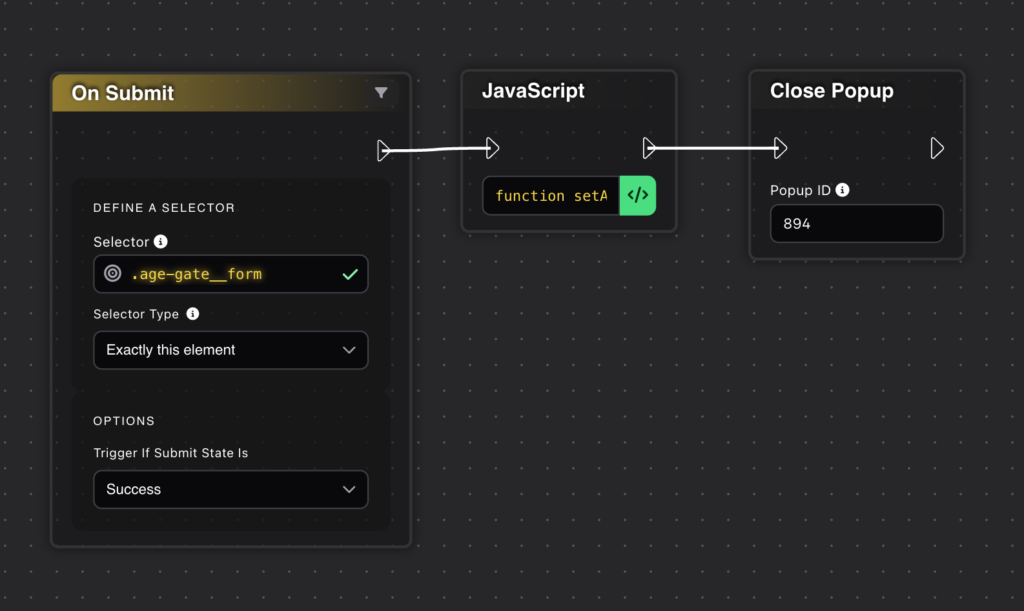
Form Submission Event
The successful form submission event will trigger another Javascript snippet that will set the storage item on the user’s browser and it will also set a time limit for the storage item to expire. The code below has several variables you can pick from to set the storage item expiration time limit.
function setAgeGate() {
  // 10 seconds = 10 * 1000 milliseconds
  const tenSeconds = 10 * 1000;

  // 30 seconds = 30 * 1000 milliseconds
  const thirtySeconds = 30 * 1000;

  // 1 hour = 1 * 60 * 60 * 1000 milliseconds
  const oneHour = 1 * 60 * 60 * 1000;

  // 8 hours = 8 * 60 * 60 * 1000 milliseconds
  const eightHours = 8 * 60 * 60 * 1000;

  // 24 hours (1 day) = 24 * 60 * 60 * 1000 milliseconds
  const oneDay = 24 * 60 * 60 * 1000;

  // 48 hours (2 days) = 48 * 60 * 60 * 1000 milliseconds
  const twoDays = 48 * 60 * 60 * 1000;

  // 72 hours (3 days) = 72 * 60 * 60 * 1000 milliseconds
  const threeDays = 72 * 60 * 60 * 1000;

  // 1 week = 7 * 24 * 60 * 60 * 1000 milliseconds
  const oneWeek = 7 * 24 * 60 * 60 * 1000;


  // IMPORTANT - set your time here
  const expirationTime = Date.now() + oneHour; // change oneHour to your desired time variable from the list above
  const ageGateData = {
    value: 'verified',
    expires: expirationTime
  };

  localStorage.setItem('age_gate', JSON.stringify(ageGateData));
  console.log('Age gate set to verified.');
}

setAgeGate();
What is an age gate and how does it work?
An age gate will restrict content until the user agrees to the terms set in your pop-up. We will use browser session storage to help us control the age gate functionality. It works by checking if there is a storage variable on the user’s browser. In our example, we will set a session storage item when the user agrees they are over 21 years old and clicks the button that says “Yes, let me in”.
Conclusion
The Bricks Forge version 3.0 brings some really awesome new functionality with the node editor. We can now easily build complex interactions, animations, and workflows, and improve the user experience with Bricks Forge. This age gate example will hopefully get the creative ideas flowing so you can build some cool functionality with Bricks Forge.
Need Help With Bricks Builder?